How to Draw a Friendly Cartoon Turtle
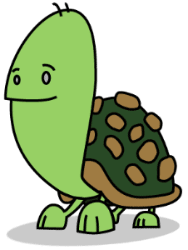
This cartoon turtle is just begging for you to follow the steps below and bring him to life with your own pencil and paper. If you've done some of the other
tutorials you should be familiar by now with making simple shapes into cool drawings. Nothing's changed with this drawing lesson so let's get started!

Step 1 - The Head and Mouth
The head and neck of this little critter may look a little complex, but really is extremely simple. Follow the arrows in step one, starting with the mouth. Draw a very small curve for the mouth - it should almost look like a straight line. From there draw a curve to make the top of the head.
This is just an upside-down "U" shape. Continue the curve down to a point where the neck will eventually go into the cartoon turtle shell. From this point draw a curve up to the first line you drew for the mouth. This line should appear to go under the top of the mouth and will give the turtle a little more personality.
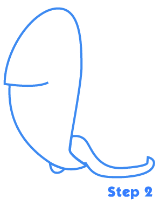
Step 2 - Add the bottom of the Shell
I don't want to baby you with the step by step drawing lesson here - just draw what you see. Think of the bottom of the shell as a tube that wraps around a ball. The ball, as you will see in step three will be the shell. At the point where the turtle's neck pokes out from under the shell add a little 'bump' to the tube. Study the image closely and you'll be fine.
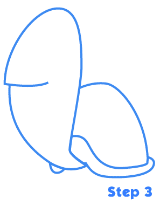
Step 3 - Add the Shell
Draw a curve that starts at about the middle of the turtle's neck and ends at the back of the shape you drew in step two. There's nothing more to say here; let's keep moving.
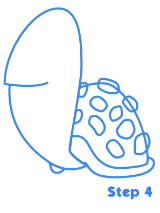
Step 4 - Detail the Shell
Add a bunch of shapes to add some interesting parts to the shell. One thing that you should notice is that some of these shapes go through the curve that you drew in step three. The purpose of this is that it will give the illusion that the details that you are adding are actually bumps raised off of the turtle's shell.
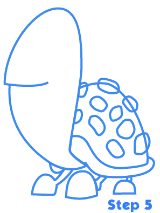
Step 5 - Add in the Feet
The feet were made simple by design. To start draw an upside down cup shape. Look at the front left foot. Can you see the upside-down cup? That's the basic shape of the foot, and you'll all some details into that in the next step. Once you have the foot, connect it to the shell of the cartoon turtle.
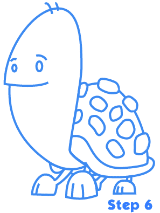
Step 6 - Final Details for the Cartoon Turtle
Finally, the last thing to do! Add some lines to the feet to show the toes. Erase the lines of the shell where the details were drawn on top in step four. The eyes of the turtle are just circles. The eyebrows are simple curves - feel free to experiment with different styles of eyebrows. The last thing that you'll want to do is add a few little hairs on top of the cartoon turtle's head to give him a little more personality. You're done!
|
