 Nose Drawing - Easier than it Looks Nose Drawing - Easier than it Looks
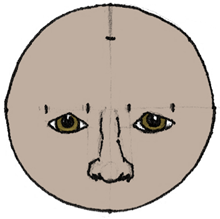
After the eyes, nose drawing is the next part we're going to work on. The nose falls between the brow line and the nose line that you created in the first tutorial. Noses come in all different shapes and sizes, and you can add a lot of character to a portrait by exaggerating a nose.
Start looking a little closer at the faces you see around you and notice all the different shapes of noses. First I will talk about fitting the nose into your character's head, and then secondly I will talk about creating a really simple cartoon nose drawing.
 Nose Structure and Proportions: Nose Structure and Proportions:
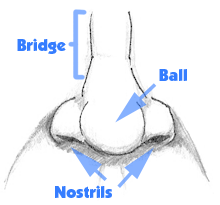
For simplicity, I break the nose into three different parts, the bridge, the ball and the nostrils. If you feel your nose with your hand and go from the middle of your eyebrows down towards the ball of your nose, the hard cartilage that you feel is the bridge. Usually the length of the bridge is about half the height of the nose. The bridge slightly widens the nose near the top.
The width of the nose at the nostrils is approximately one eye width. If you draw guide lines down from the inner corners of the eyes you can get a good idea of how wide the base of your nose should be.
With these basic proportions under your belt what's left to do is draw, draw, draw! There's no magic bullet solution that I can give you. Now that the basic proportions have been laid out you will have to rely on your eyes to guide your hand and fill in the missing details.

Nose Drawings from different Angles
Some things to keep in mind:
- Nose drawing is a little different when drawing men than when you are drawing women. In females the nose should be much softer, unless you are trying to make her look like an old witch.
- In men the bridge of the nose should bulge a little.
- Use your finger to feel the shapes of your own nose to help you find the true forms of the nose.
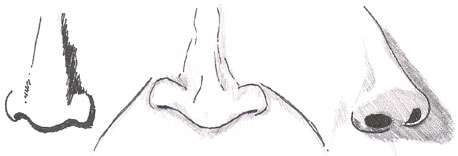
More Drawings of Noses
Drawing a Simple Cartoon Nose
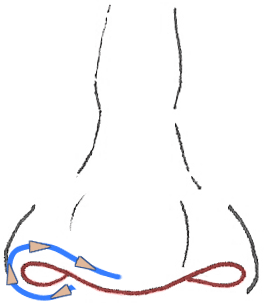 A friend showed me this really simple way to draw a cartoon nose back when I was in University. If you're not ready to jump into drawing a realistic nose, I hope this quick fix nose drawing can get you going. A friend showed me this really simple way to draw a cartoon nose back when I was in University. If you're not ready to jump into drawing a realistic nose, I hope this quick fix nose drawing can get you going.
Start your line on the inside of the nostril. I usually choose the right nostril and then draw the nose from left to right.
Begin to draw out the nostril with a curve, bending it down and away from the point that you started with.
Continue to curve the line back towards the starting point. Close off the hole, and you have just created the first nostril.
Continue the curve downward and in towards the middle. This curve will make the ball of the nose and can be bigger than the nostril. Continue the ball shape, and create a nostril on the other side of the head that matches the first hole that you created.
Almost done! Now, add some lines on the sides of the nose to finish off the nostrils.
Finished! To make your nose more realistic you can add in some shading, and also some additional lines to indicate the bridge of the nose.
|
